During the onboarding process for hub deployments, we can grant authorized technical contacts to access Grafana with administrative privileges. Once they are logged in, they can invite others from their community to access to the dashboards.
Steps
The following process is similar for authorized community representatives and 2i2c engineers. Click on the relevant tab below where applicable.
Find the Grafana URL - this is usually of the form
https://<grafana>.<community>.2i2c.cloud.You can find the URL by looking at the
support.values.yamlfile insideconfig/clusters/<cluster-name>You can also look at the List of Running Hubs table, and click on the “Grafana” link
- Community representative2i2c engineer
Login with the username and password that you set when you were first onboarded to the hub. If you have forgotten your password, please contact support to reset it.
Login with the admin account. The username is
admin, and decrypt the filehelm-charts/support/enc-support.secret.values.yamlwith sops to find the password. Alternatively, this secret is also available in the shared BitWarden vault. Expand the “hamburger” menu on the left-hand-side, then expand the “Administration” sub-menu (denoted by a gear icon), and then select “Users”.
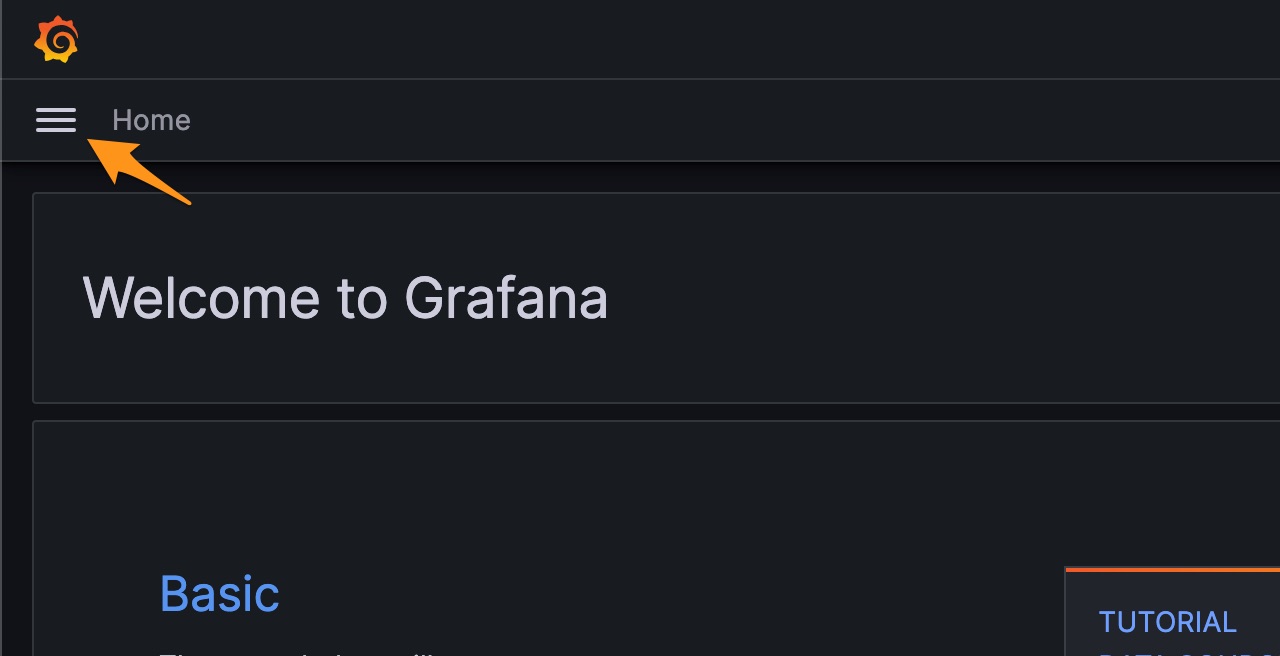
Location of the “hamburger” menu on the Grafana dashboard
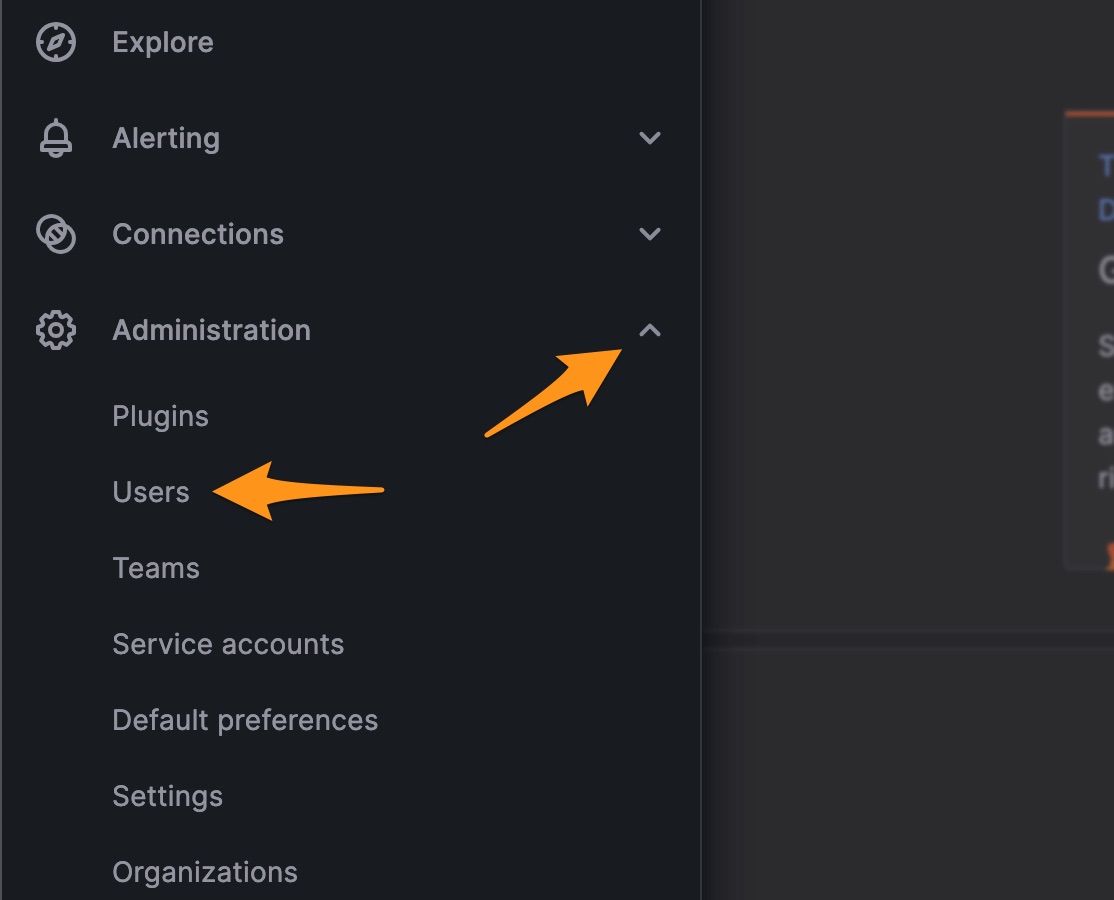
Expand the “Administration” sub-menu, and then select “Users”
Select “Organization users”, and then select the blue “Invite” button on the right-hand-side.
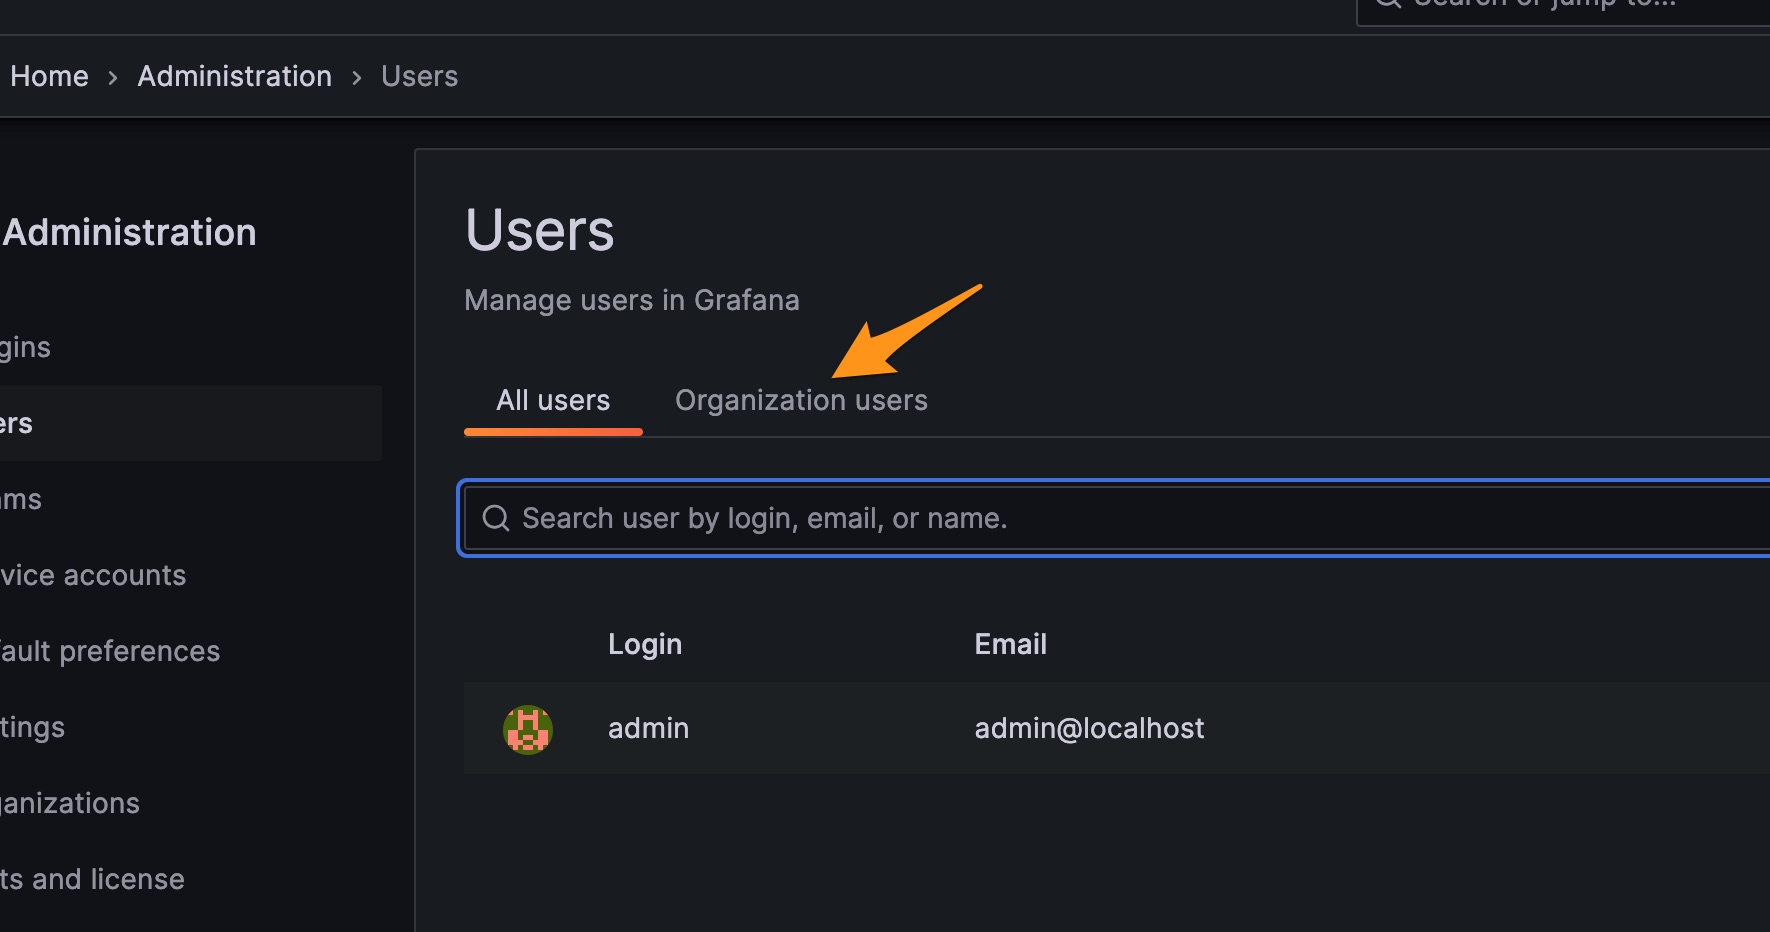
Select the “Organization users” tab
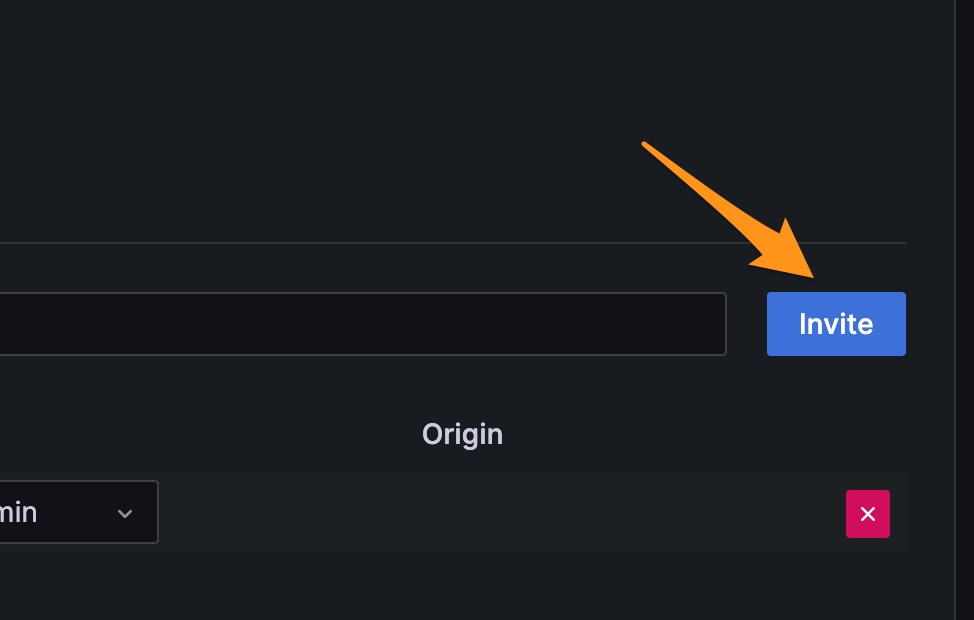
Select the blue “Invite” button on the right-hand-side
Enter the email address of the community representative we want to create an account for. Leave the name blank (they can fill it in later if they wish). Give them an Admin role (so they can invite others if needed). Deselect ‘Send invite email’ since there is no outgoing email server configured on the Grafana instance. Click Submit.
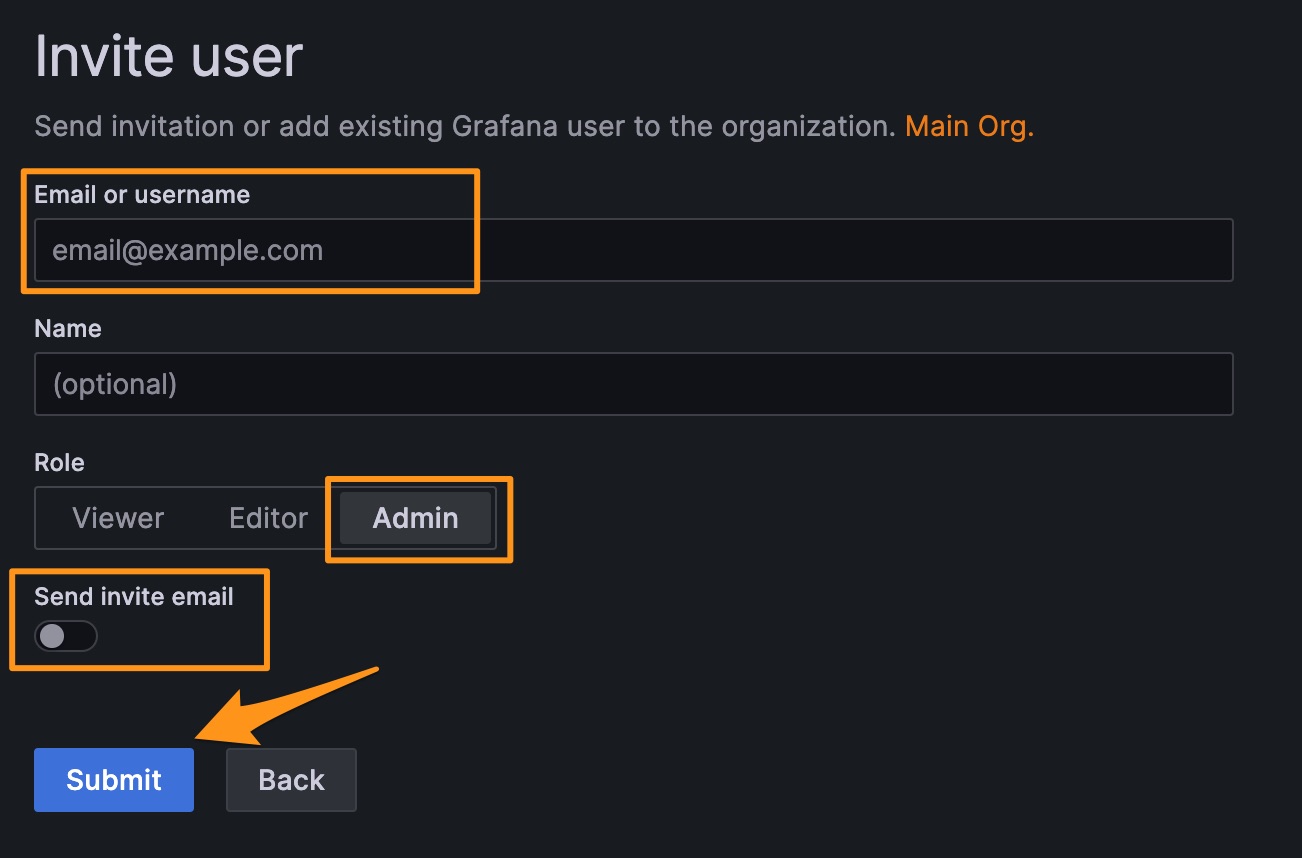
Input the email address of the community representative. Give them the “Admin” role. Toggle off the “Send invite email” option.
You will be brought back to the Users page. Select the “Organization users” tab again, and now to the left of the ‘Invite’ button, you’ll see a button named ‘Pending Invites’. Click that.
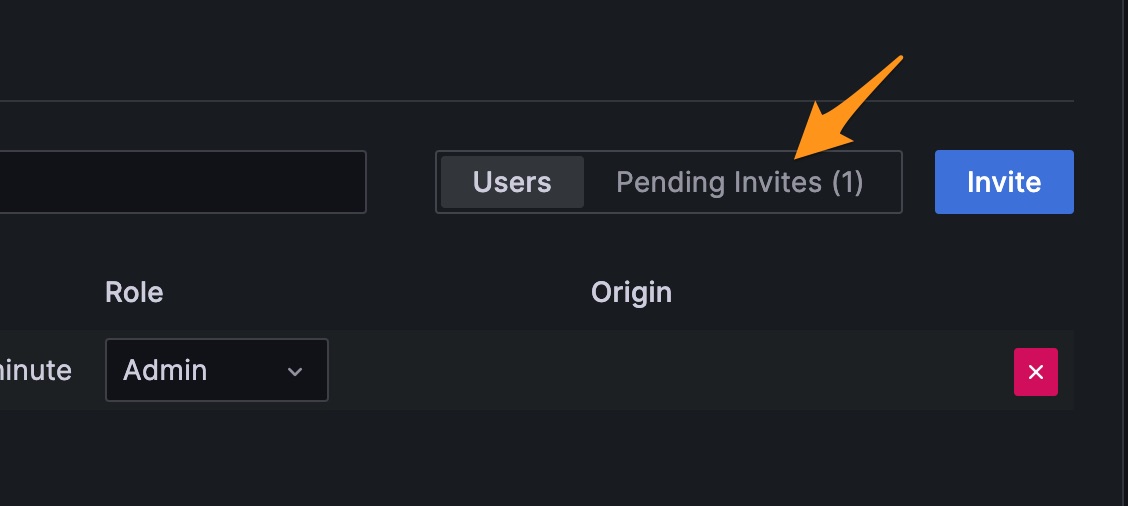
Select the ‘Pending Invites’ option from the ‘Organization users’ tab
Find the invite for the user you just added, and click the ‘Copy Invite’ button for that user. This will copy an Invite link for that user, that can be sent back to the community representative! They should be able to click the link, and create an account in the Grafana to have access to all the dashboards.
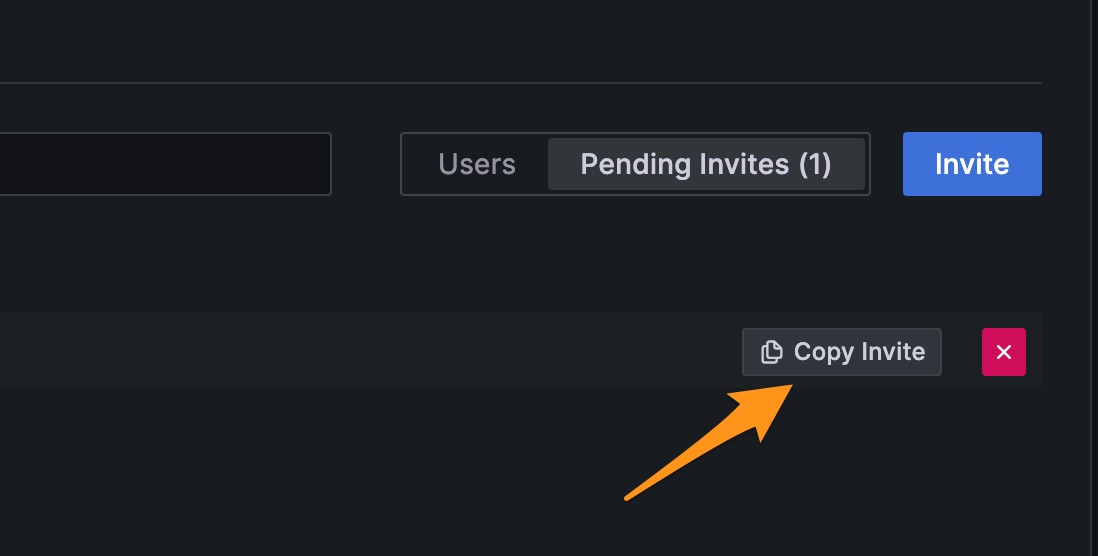
Select the “Copy invite” button next to the user you just created